Hosting websites with Azure App Service and Continuous Deployment

A couple of days ago my intern at Treatsure asked me “How do I deploy a website from Github to Azure?”. I remembered playing with this feature on Azure Classic Portal a couple of years ago trying to host static website on Windows Azure. Today, given the new Azure Portal, I’ll provide a detailed walkthrough of the steps required to get started.
What is Azure App Service?
App Service Web Apps is a fully managed compute platform that is optimized for hosting websites and web applications. This platform-as-a-service (PaaS) offering of Microsoft Azure lets you focus on your business logic while Azure takes care of the infrastructure to run and scale your apps. For most scenarios, Web Apps is the best choice. For microservice architecture, consider Service Fabric, and if you need more control over the VMs that your code runs on, consider Azure Virtual Machines.
Azure App Service makes it easier and convenient for developers to configure continuous deployment on Azure between Github (Public Repository) and Azure Websites. However, today, I’ll be walking through connecting to Github (Private Repository) instead. One of the biggest advantages is that, any changes will be pulled instantenously and synchronized with your source codes. Kudu is the engine behind git/hg deployments, WebJobs, and various other features in Azure Web Sites. It can also run outside of Azure.
To create a website on Azure, let’s start by creating a new App Service. Follow the steps below.
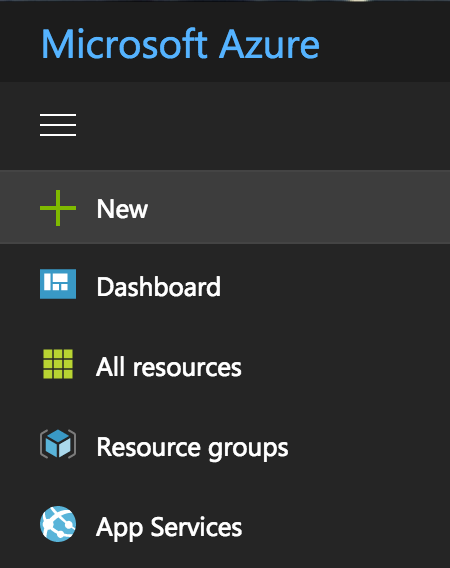
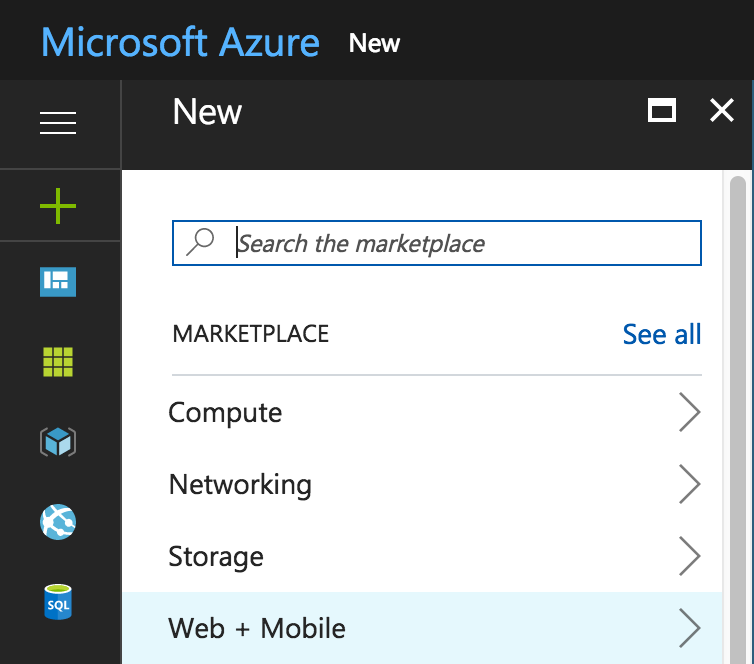
Select “Web + Mobile”
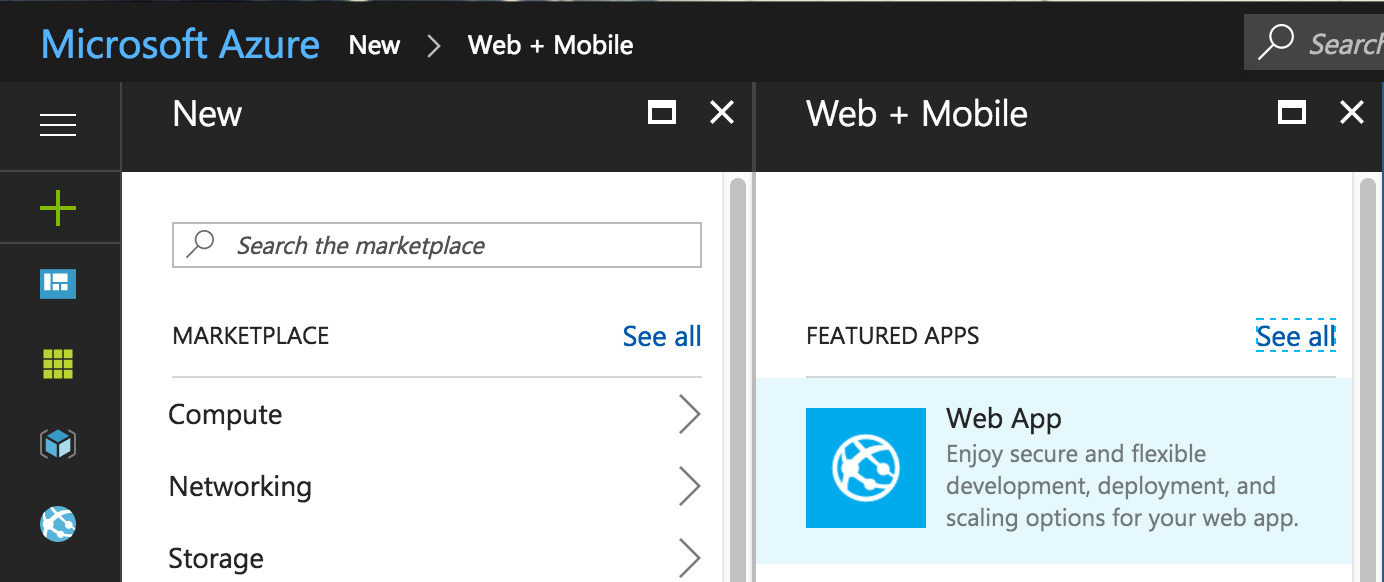
Select “Web App”
You will be presented with this screen. Here are the options to configure your Web App. In my scenario, I chose an App Name that reflects mysite.azurewebsites.net. Select your subscription. Since we’re on BizSpark, therefore, our subscription is tied to “Visual Studio Enterprise: Bizspark” subscription. Following which, you can create your own resource group, and since we have our own resource group, we’ll be using ours. Resource groups are a great way to manage all your resources centrally at one location.
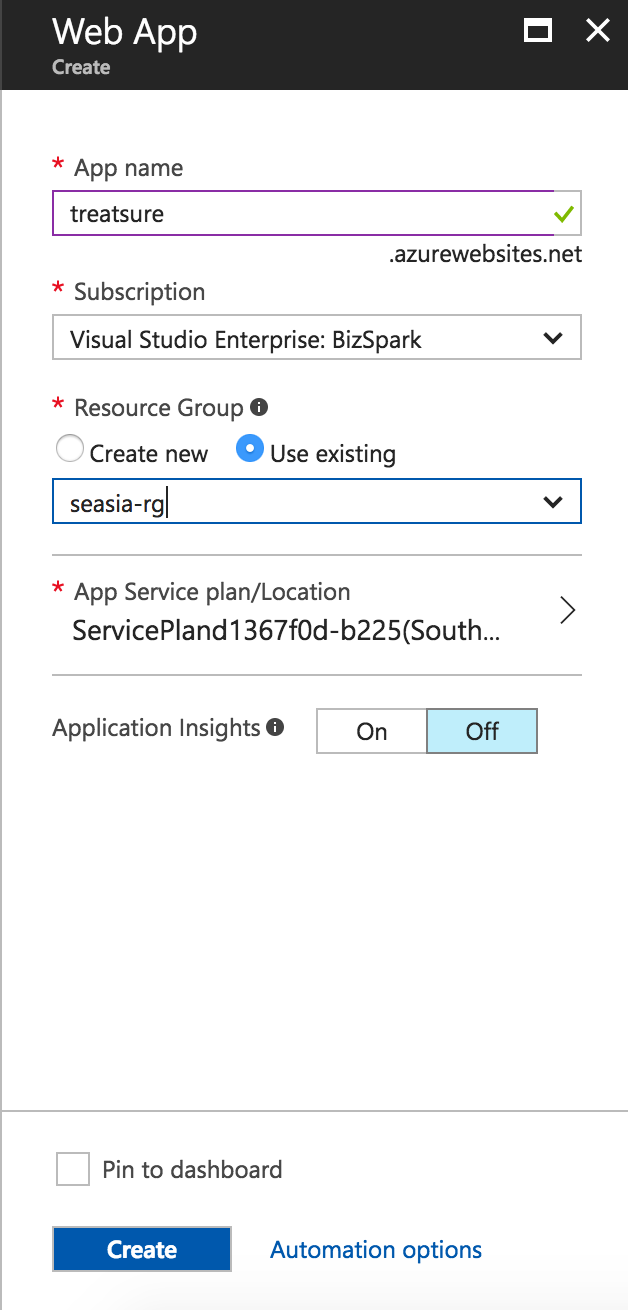
Choose your App Service Plan/location. I’ve set it to Southeast Asia. It is recommended to set your location closest to your country. Also, you can decide the pricing tier that fit your needs. For websites in general, I recommend either S1 Standard or B1 Basic tier. Moreover as a startup, since we do not have high traffic load, I’ve set it to B1 Basic Tier, which is good enough at the moment. You could then automatically scale up or scale out with Azure.
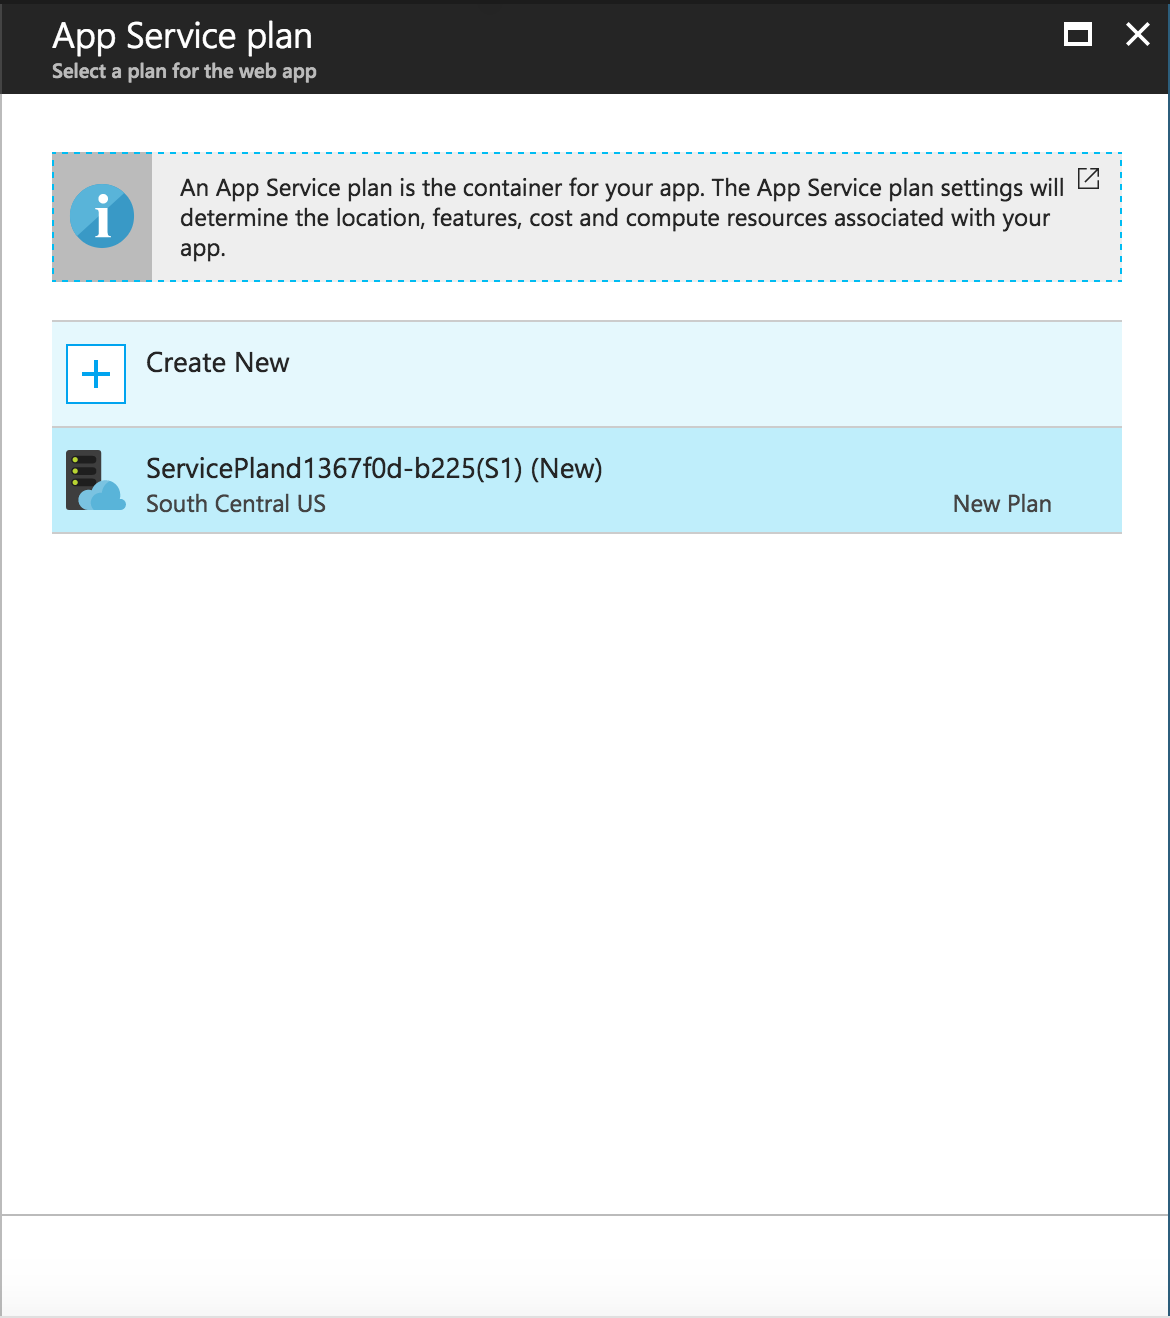
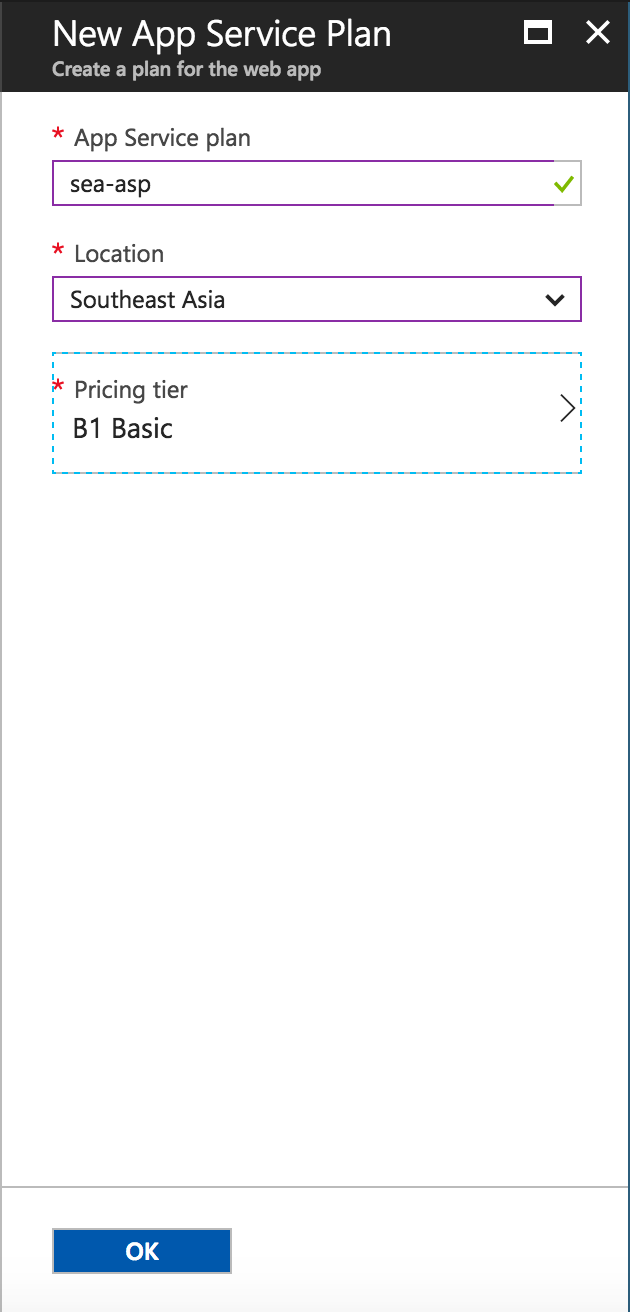
Once your App Service is deployed, you can now access your app service. We’ll set it to access a private git repository.


Select Deployment Option. Choose Local Git Repository. You could choose other options such as Github, Bitbucket, etc. Github authenticates with your Github account and will pull from Public Repositories only. Although it will show you a list of repositories in your Github, private repositories will not be accessible by App Service. Whereas, Local Git Repository creates a git repository in app service and creates continuous deployment with Kudu to pull on webhook trigger from Github.
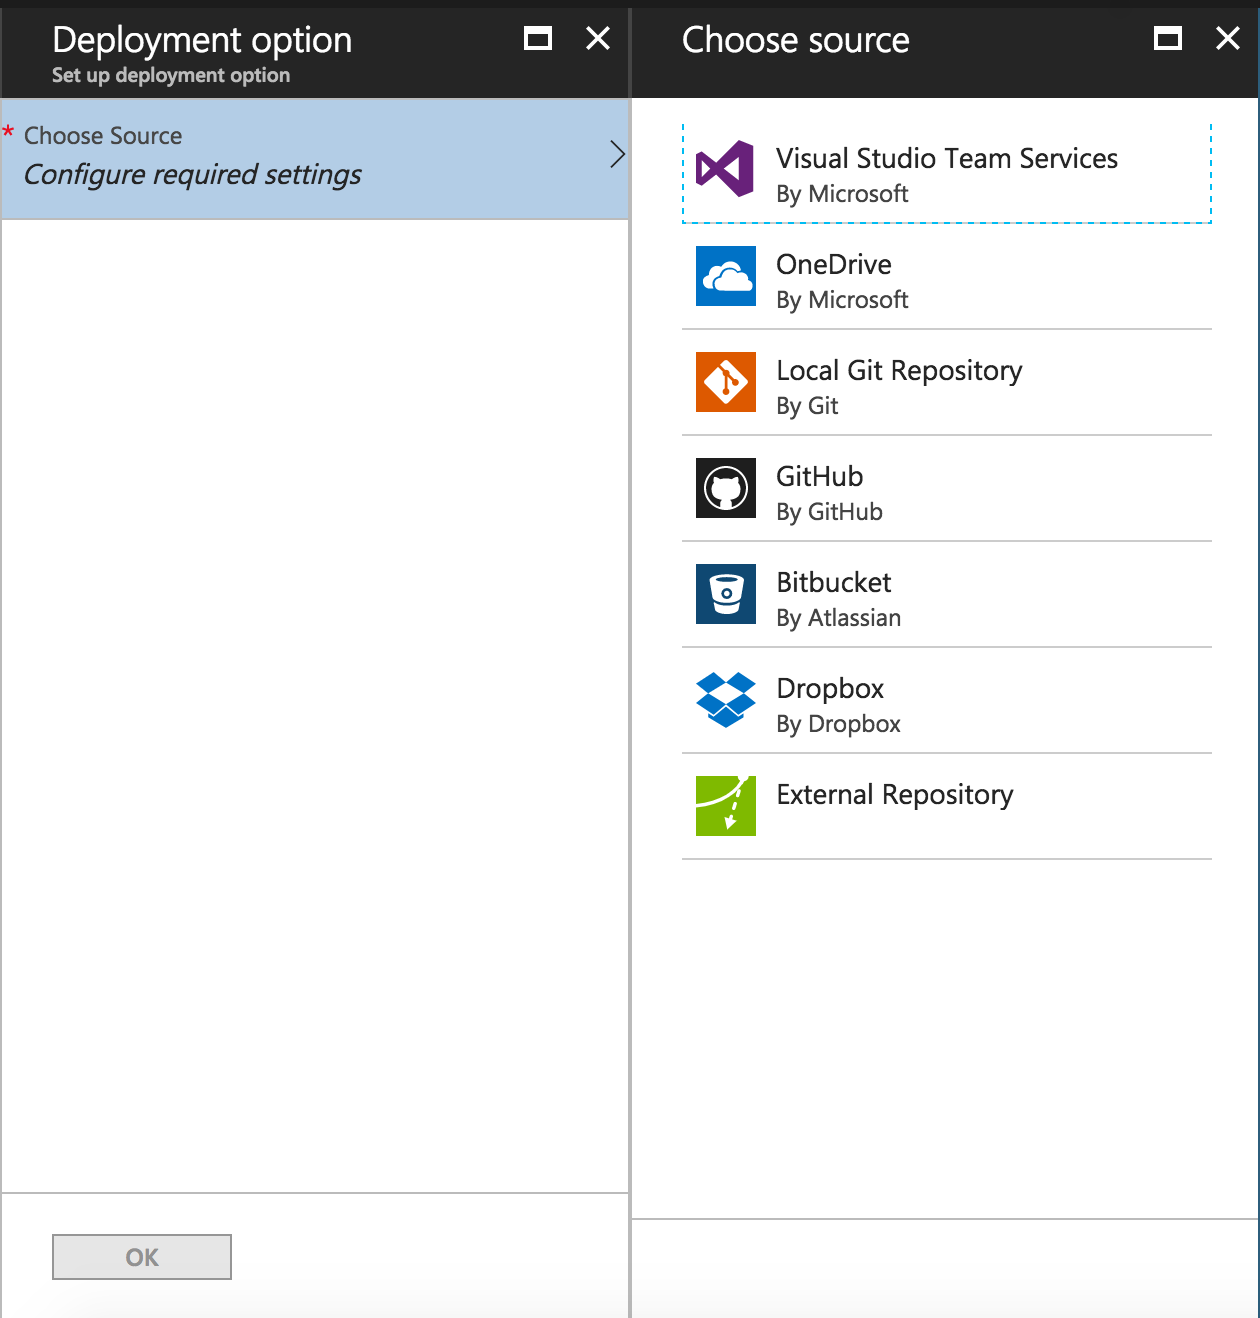
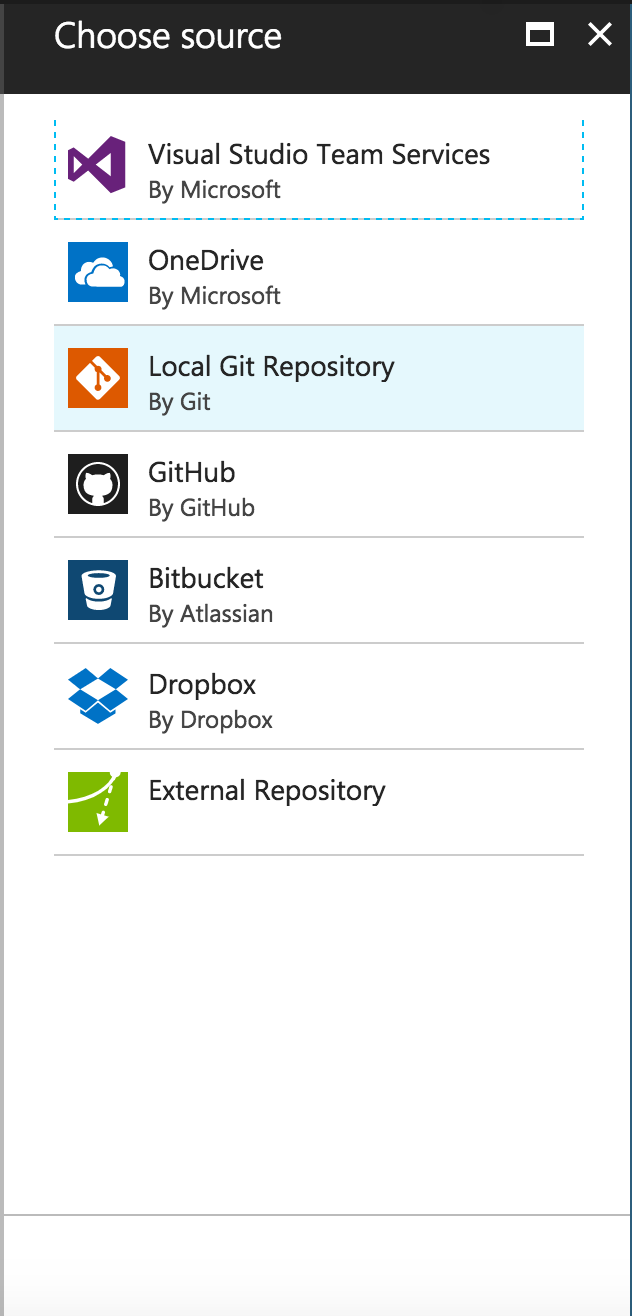
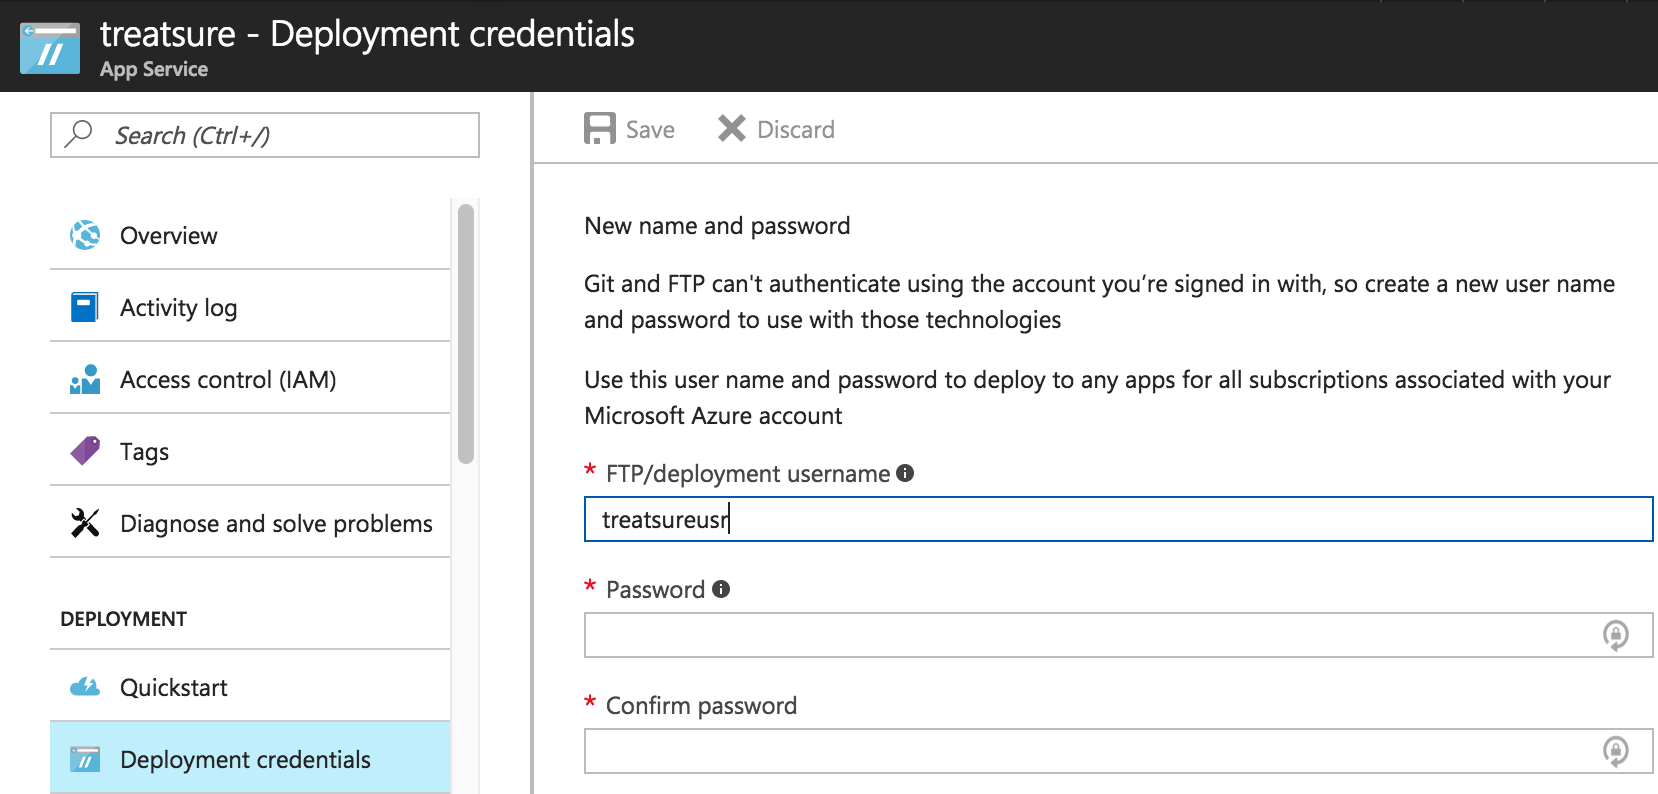
I’ve set up with Github and Local Git Repository initially and didn’t capture the screenshot for Local Git Repository, however, upon selecting Local Git Repository, you should see something similar to the one below. This option can be found under “Deployment Credentials” as well. Please enter your desired deployment username and password, and ensure that you keep them safe.
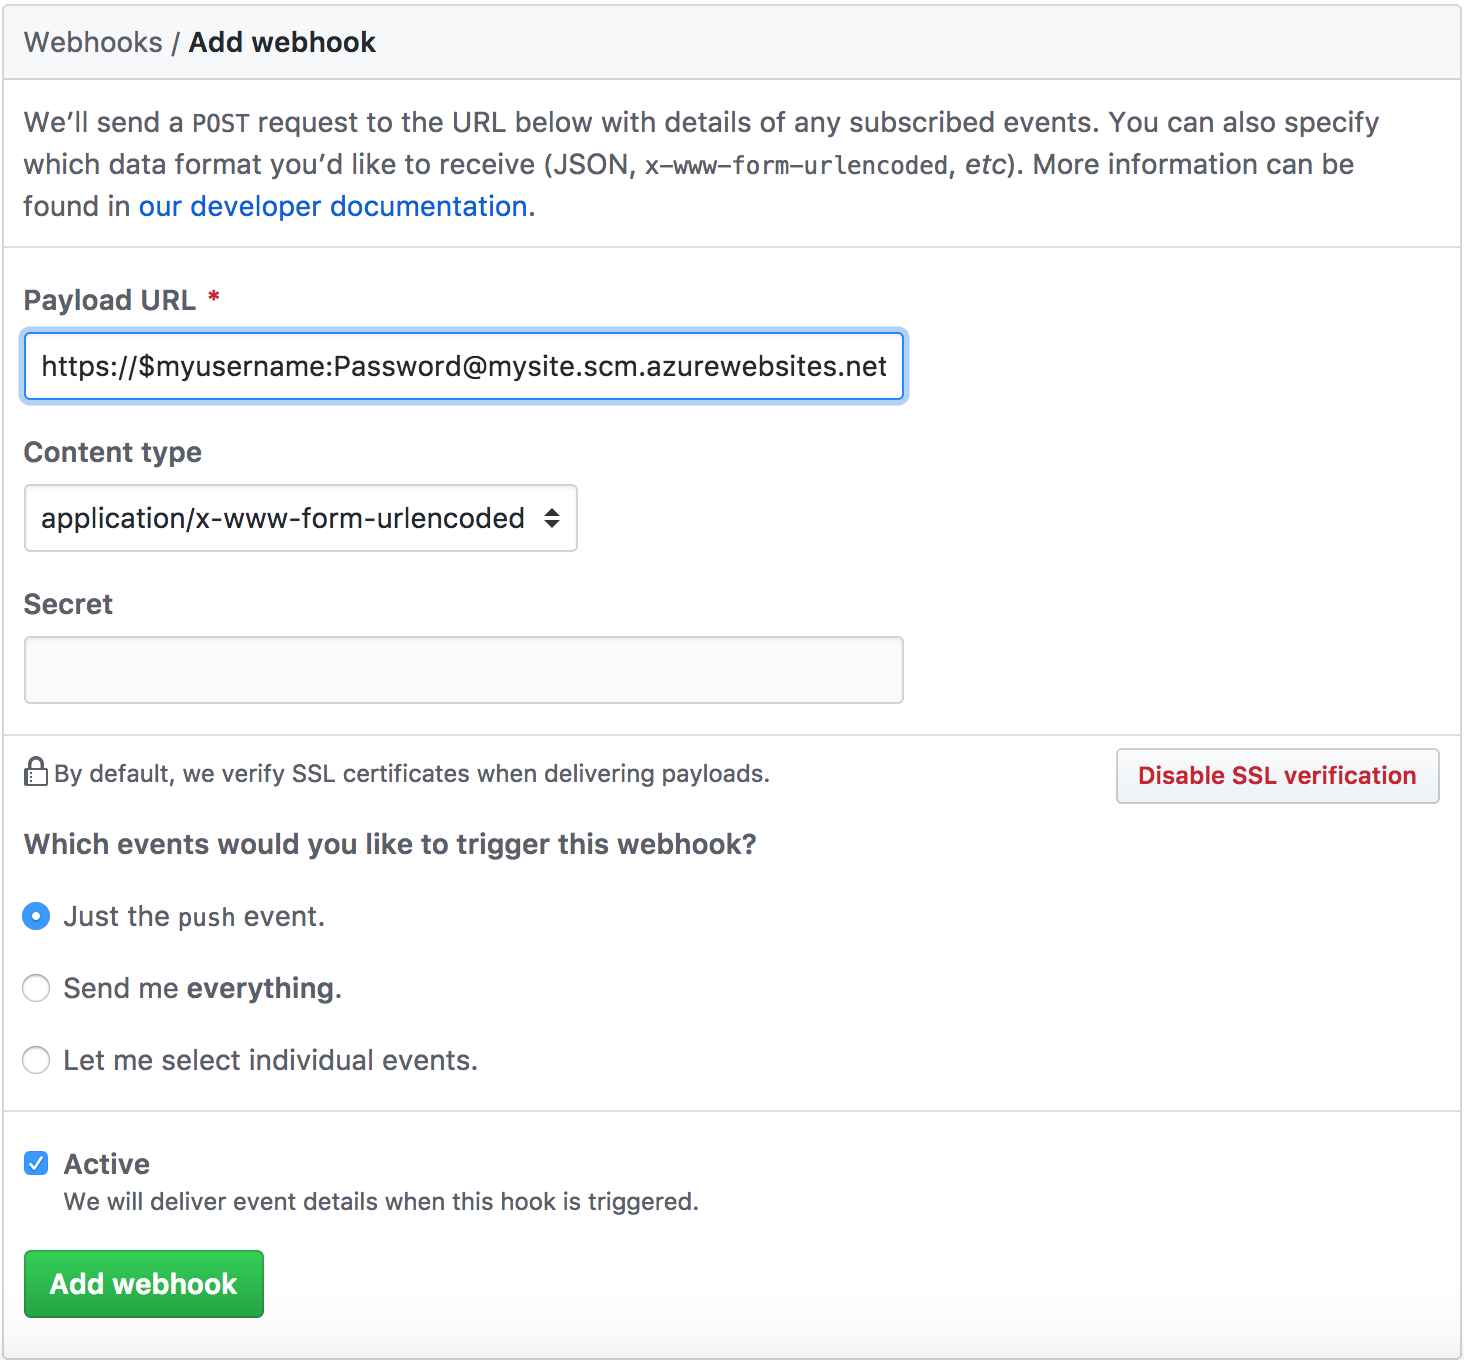
Now let’s configure Github to allow App Service to pull from your repository. Head over to your Github Repository and select “Settings” > “Webhooks” > Add Webhook. I’ve already linked up one webhook, and you could link up as many webhooks as you want to different services.


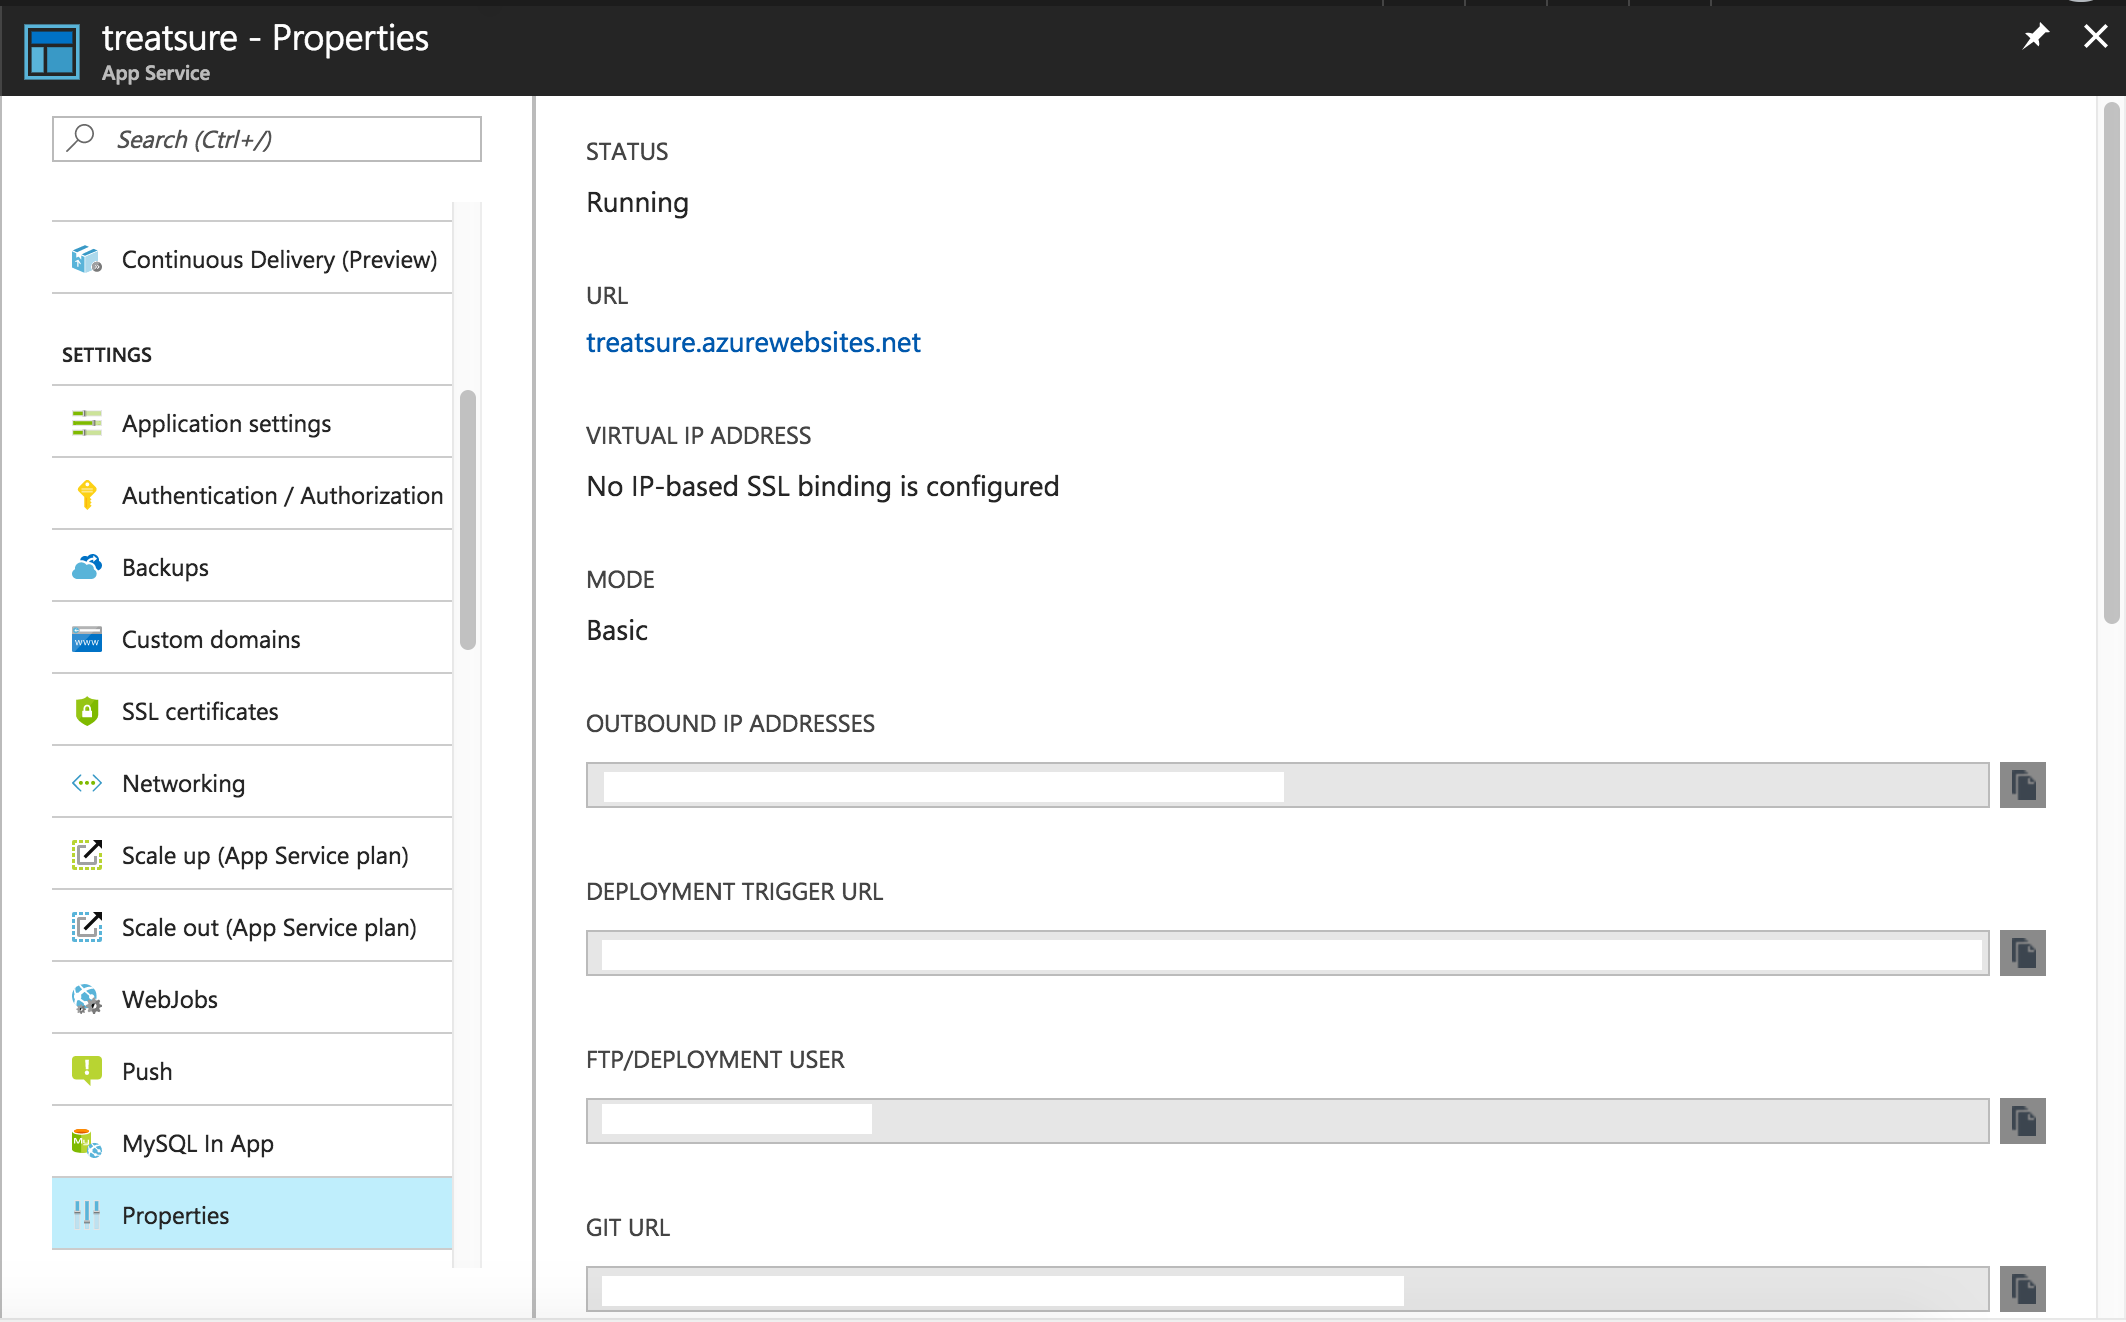
Then, configure your webhook to the following format. In Azure Portal, under your App Service website, find the Deployment Trigger URL under “Properties”. Copy & paste that information into Github’s Webhook Payload URL. Ensure that the content type is application/x-www-form-urlencoded. Leave the default settings unless you want to customize them, otherwise proceed to add webhook.
1
https://$deploy-user:[email protected]/deploy
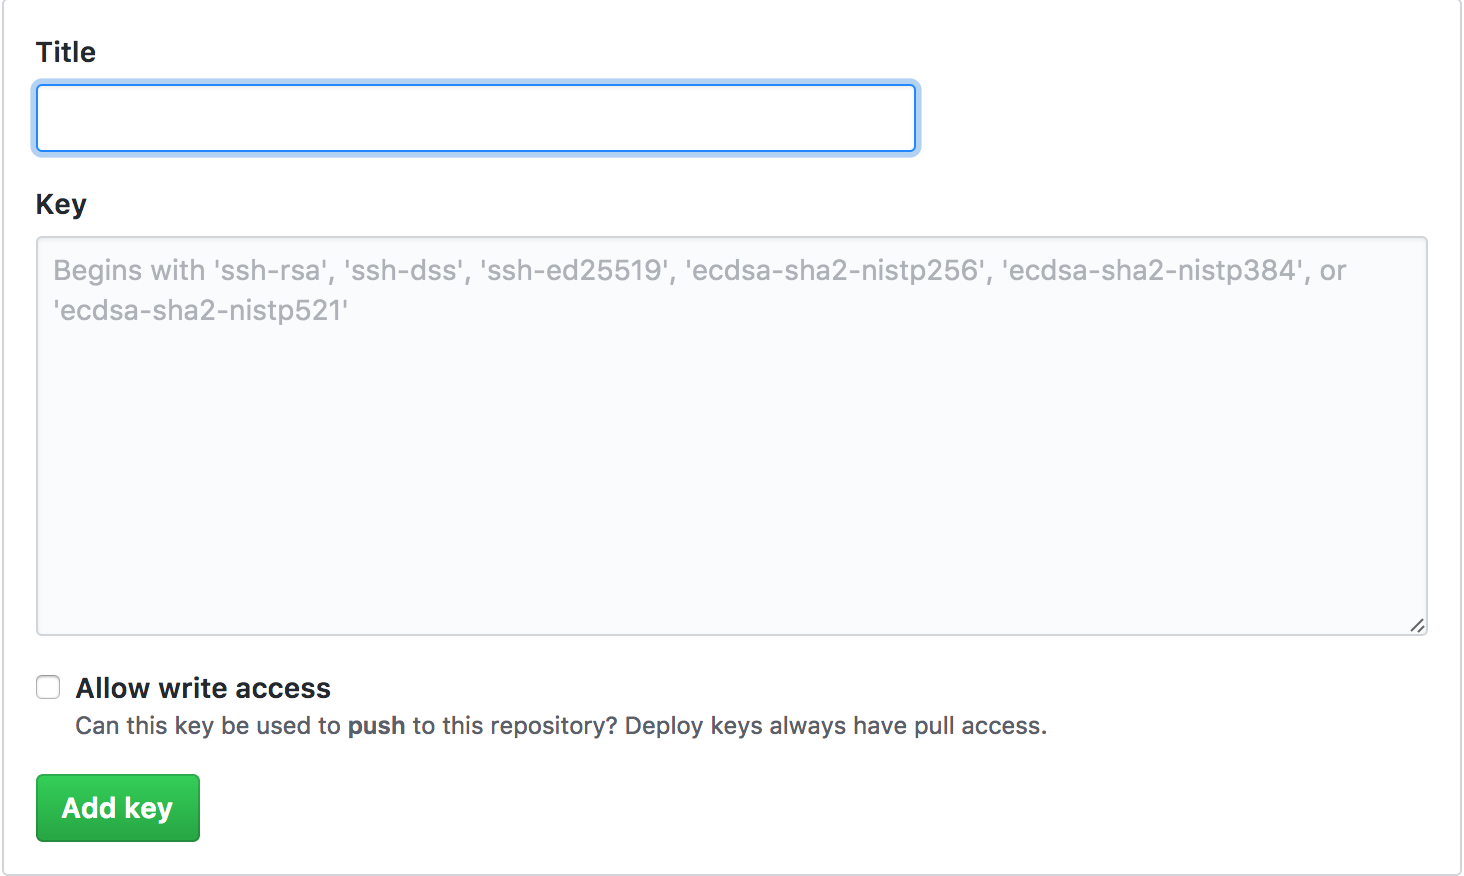
We’re almost there! We need to setup the deployment key to allow access in order to deploy to App Service. Click on Deploy Keys > Add deploy key. To get the deploy key, simply go to https://$deploy-user:[email protected]/api/sshkey?ensurePublicKey=1 with the credentials you set earlier. Copy & paste the SSH-RSA deployment key from our App Service to our private repository in Github.
You should see something like that:
*only copy the content inside the "
1
"ssh-rsa AAAAG12345CDEFG..."
If you have successfully added your deploy key, you should see that your key has been added!

Once you’ve set that, you’re done and good to go! To validate and test that your continuous deployment is fully functional, push an update to your git repository and review the deployment history for your site in Azure Portal under Deployment Options. Deployment logs can be found by clicking on the log itself.

I hope this walkthrough helps you create your first website hosting with Azure! If you face any issues, don’t hesitate to leave a comment or ping me!
Cheers!