Containers Series II - Deploying Jekyll on Azure

Previously, I shared about how you can run Docker on Azure Web App for Containers. This week, I’ll share about deploying Jekyll static websites or blogs onto Azure Web App for Containers.
In the previous article, I have introduced the basics to running Docker and setting up a simple Hello World with Azure Web App for Containers from DockerHub. This article will leverage on some of those earlier touch points to deploy Jekyll onto Azure Web App for Containers. The concept isn’t too revolutionary, we’re creating our own docker image and pushing that onto Azure Container Registry, then connecting Azure Web App for Containers to pull and deploy from Azure Container Registry (ACR).
Jekyll Custom Image
Jekyll is a static CMS that publishes your content using Markdown for websites or blogs. My blog is running on Jekyll on top of Azure Web App for Containers. Let’s get started to build the Dockerfile.
Getting Started
Firstly, we’re create a Dockerfile to build our custom Jekyll image. This is a simple Dockerfile to pull from Jekyll repository and running it.
1
2
3
FROM jekyll/jekyll:stable

CMD ["jekyll", "serve", "--watch", "--incremental", "--force_polling"]
What we are doing here is to set the startup command to run jekyll serve.
Deploy to Azure Container Registry
By now, you’d realize that creating a Dockerfile is that simple, now all we got to do is to deploy it to ACR. ACR is Azure’s Docker private Registry on Azure resources, hence, if you’re looking into a private registry without the need to host and maintain one, ACR is a good choice.
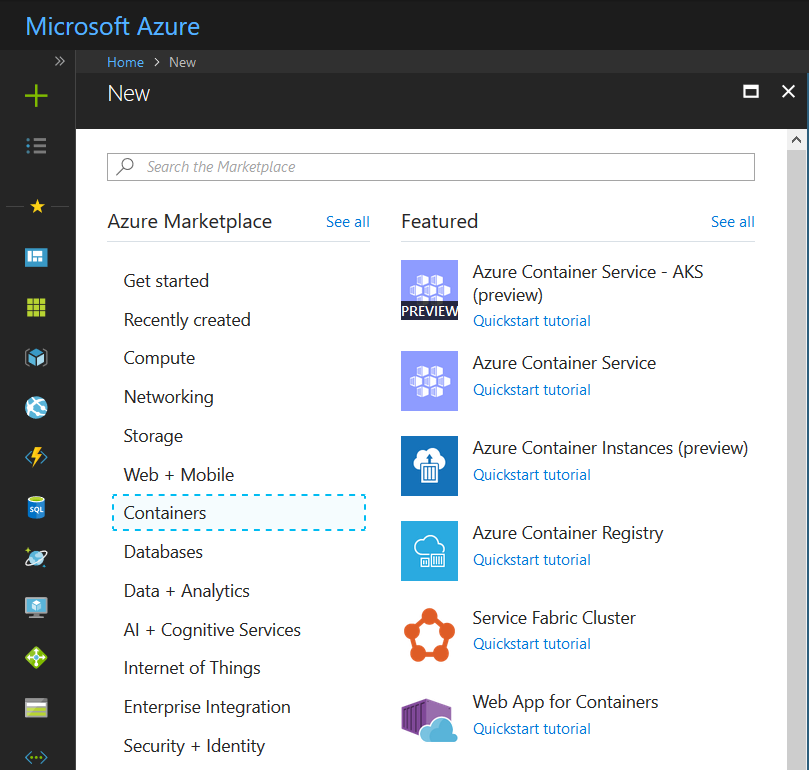
We’ll start by creating an Azure Container Registry in the Azure Portal.
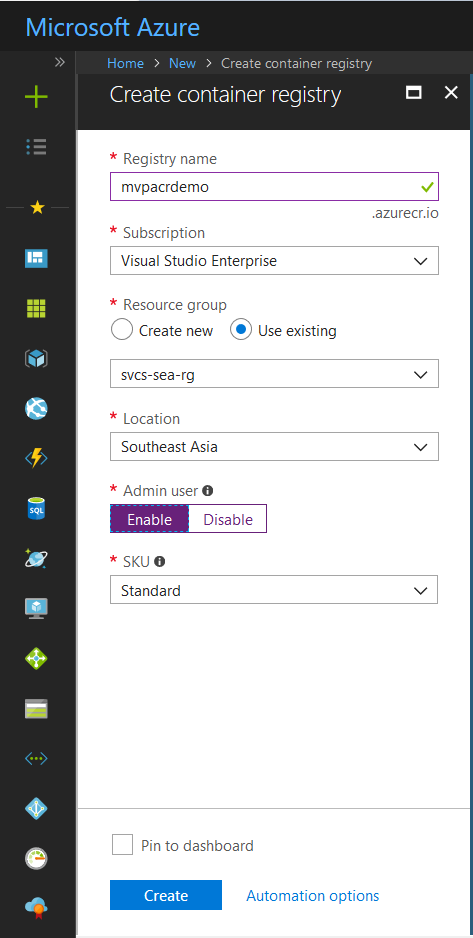
Let’s give the private registry a name and choose the region that is closer to your country. When you are all set, just click ‘Create’ to create your first Azure Container Registry.
Now that we’ve got ACR created, we’ll push our Docker image up to our newly created private registry.
(Steps adopted from Azure Container Registry Documentation)
Log in to a registry
There are several ways to authenticate to your private container registry. The recommended method when working in a command line is with the Azure CLI command az acr login. For example, to log in to a registry named mvpacrdemo:
az acr login --name mvpacrdemo
Create an alias of the image
Use docker tag to create an alias of the image with the fully qualified path to your registry. This example specifies the demo namespace to avoid clutter in the root of the registry.
docker tag jekyll mvpacrdemo.azurecr.io/demo/jekyll
Push the image to your registry
Now that you’ve tagged the image with the fully qualified path to your private registry, you can push it to the registry with docker push:
docker push mvpacrdemo.azurecr.io/demo/jekyll
Pull the image from your registry
Use the docker pull command to pull the image from your registry:
docker pull mvpacrdemo.azurecr.io/demo/jekyll
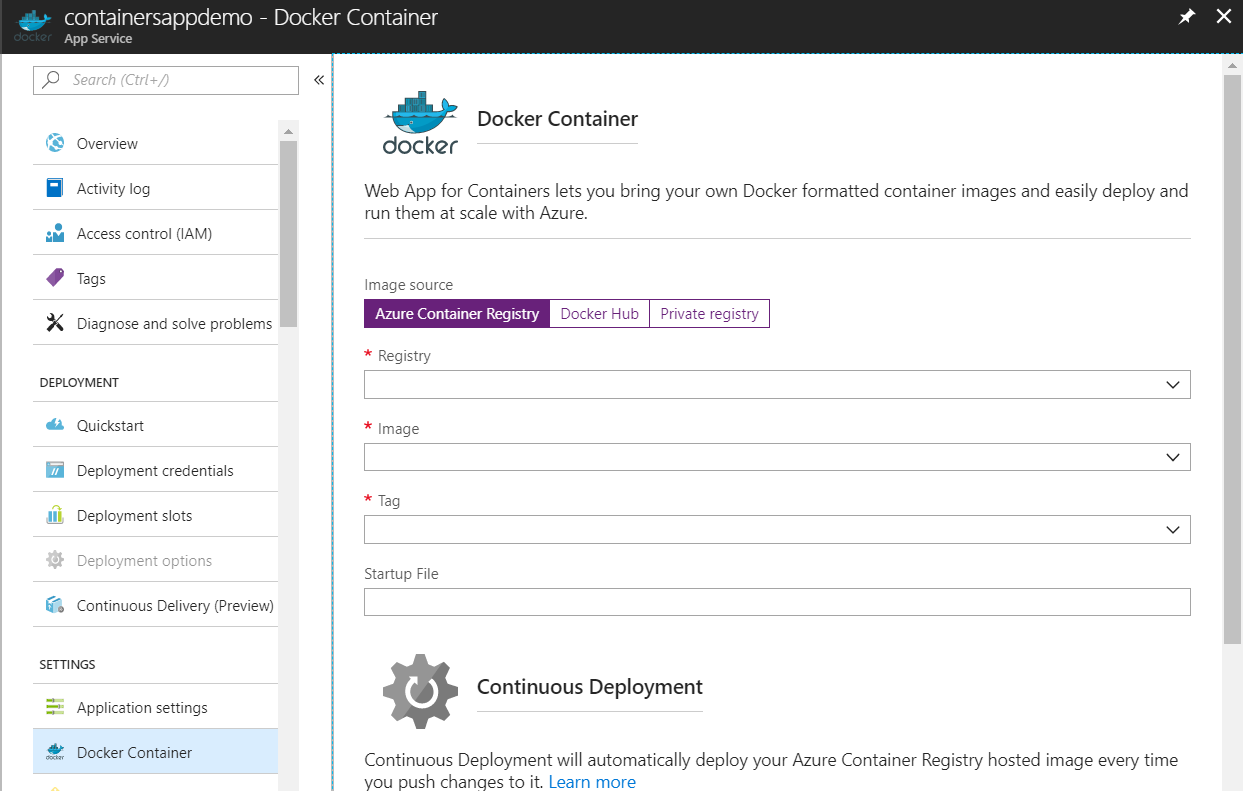
Finally, the last step is what we have done in the previous article from Dockerhub, the only difference now is that we’re pulling from our own private registry on ACR.
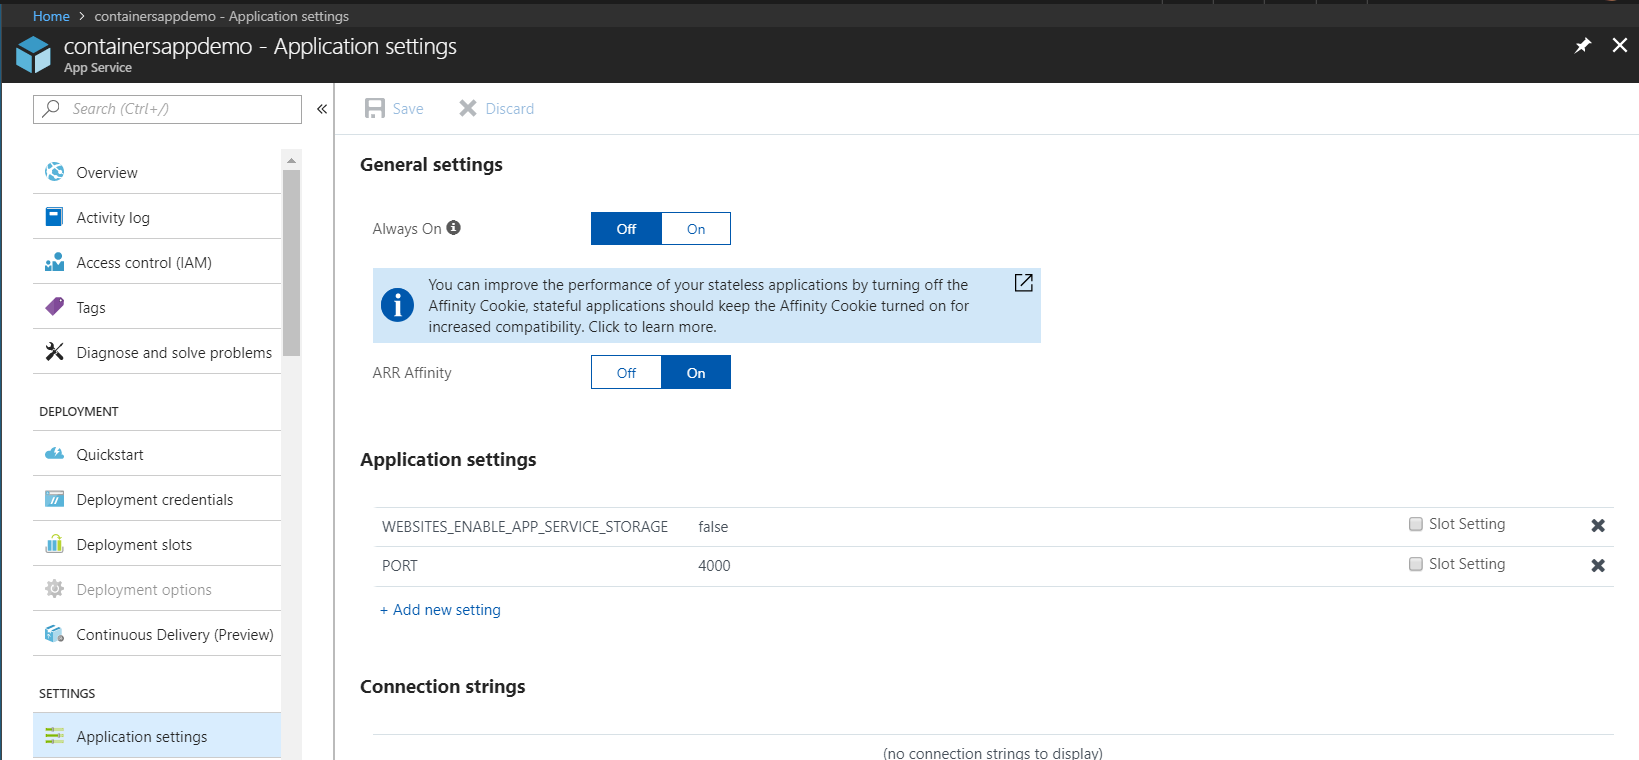
The last thing you need to do for Jekyll to run is to set the PORT => 4000 under Application Settings.
That’s it!
We’ve covered on how to create an Azure Container Registry resource, creating your Dockerfile with your own image, pushing your Docker image to Azure Container Registry, and finally deploying it to Azure Web App for Containers.
Next series, we’ll be looking into the end-to-end DevOps Continuous Integration & Continuous Deployment (CI/CD) pipeline with Visual Studio Team Services (VSTS) deployment to Azure.
Cheers!


